

Choker can rightly
be called the main accessory of the season. This trend of the 90s just
conquered the world's runways and pages of glossy magazines, but also won the
hearts of many fashionistas. You can make your own choker. Today I'll share
with you 4 easy and budget DIY. A bit of
velvet ribbon, rhinestones or beads, and voila! Stunning and stylish accessory
on the neck is ready.
Чокер можно по праву назвать главным аксессуаром этого сезона.
Этот тренд из 90-х буквально захватил мировые подиумы и страницы глянцевых журналов,
а также покорил сердца многих модниц. Сделать
чокер довольно просто самостоятельно. Сегодня я покажу 4 легких и бюджетных способа.
Немного бархатной ленты, страз или бусин, и вуаля! Потрясающее и стильное украшение
на шею готово.
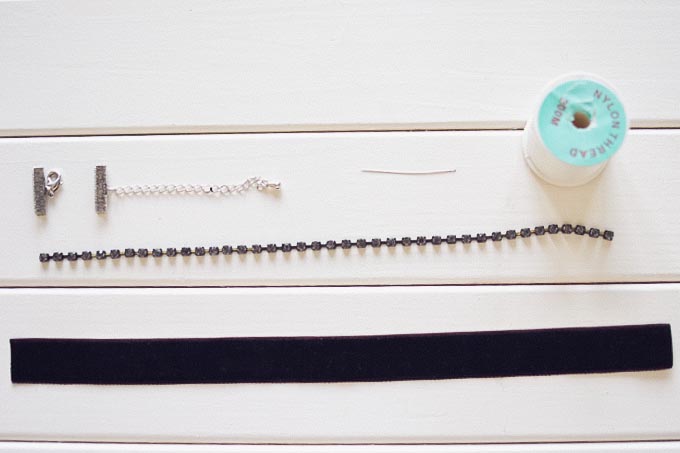
You need:
- 4 x 30
cm piece of velvet ribbon (I choose a black, brown and red colors),
- rhinestones,
- brooch,
- pearls beads,
- crystal rhinestone chain,
- needle,
- nylon thread,
- pliers,
- clasp (4 pcs clasp).
Вам понадобится:
- 4 отреза бархатной ленты по 30 см (я выбрала
черного, коричневого и красного цвета),
- стразы,
- брошь,
- бусины под жемчуг,
- цепь со стразами,
- иголка,
- нейлоновая нить,
- плоскогубцы,
- застежка-концевик (4 шт).

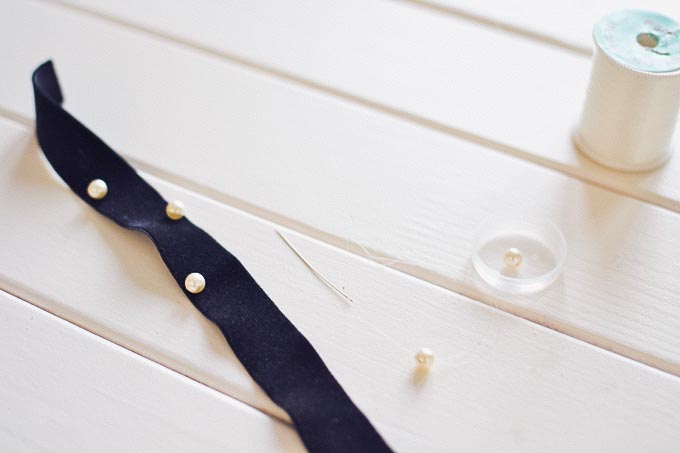
Choker with pearl beads
Чокер с жемчужинами
1) Measure the diameter of the neck. Cut the
ribbon to the required length.
1) Измерьте диаметр шеи. Отрежьте ленту необходимой длины
2) Attach pearl beads to the ribbon
and sew them with the help of needle and nylon thread.
2) Положите бусины на ленту и пришейте их с помощью иголки и нейлоновой
нити.
3) Lay the ribbon end in the ends
of the clasp. Take the pliers and firmly press the clasp.
3) Вложите конец ленты в застежку. С помощью плоскогубцев плотно прижмите
края застежки.
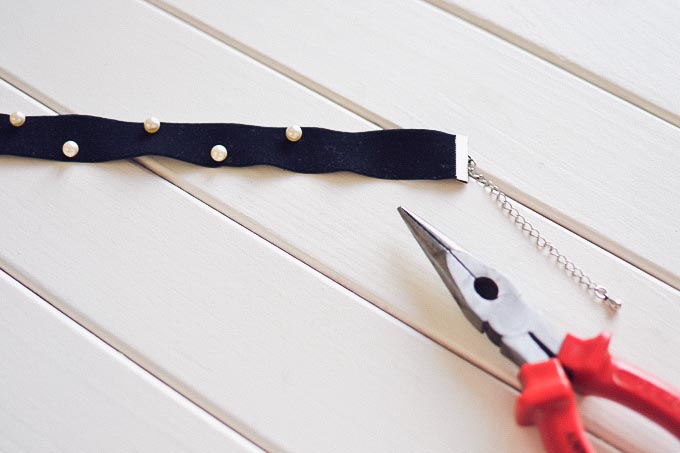
4) Repeat this step at the other
end.
4) Повторите этот шаг с другим концом.
Choker with a brooch
Чокер с брошью
1) Cut the ribbon to the required
length.
1) Отрежьте ленту необходимой длины
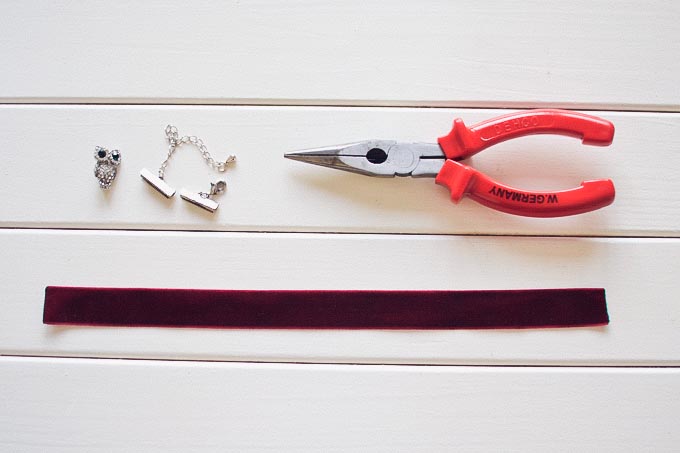
2) Measure to the middle of choker.
Then attach a brooch to velvet ribbon.
2) Определите середину чокера. Затем прикрепите брошь к бархатной
ленте.

3) Repeat all the above steps with the ends of the clasp.
3) Повторите все вышеуказанные шаги с застежкой.
Choker with rhinestones
Чокер с кристаллами
1) Find the center on a velvet ribbon
2) Определите центр на бархатной ленте
2) Attach rhinestones to the ribbon and sew them with the help of needle and nylon thread.
2) Положите кристалл на ленту и пришейте их с помощью иголки и нейлоновой нити. 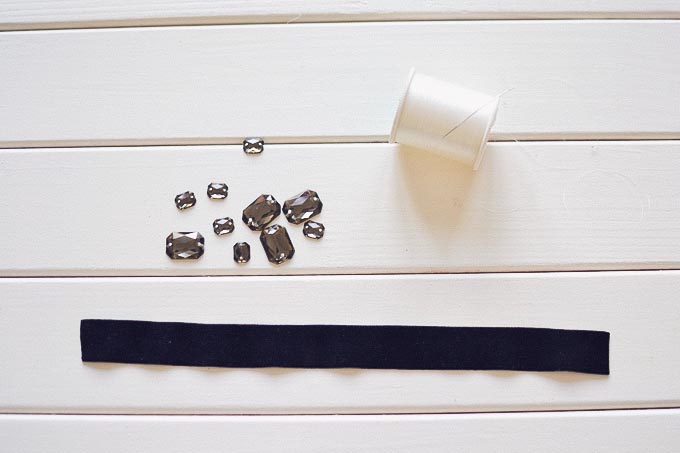
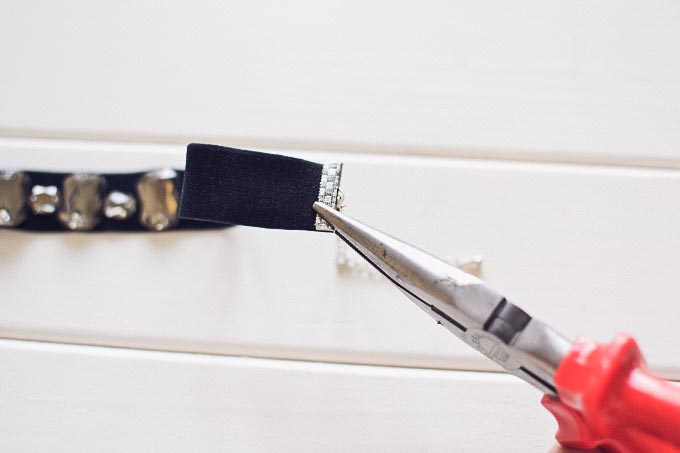
3) Repeat all the above steps with the ends of the clasp
3) Повторите все вышеуказанные шаги с застежкой.
Choker with crystal
rhinestone chain
Чокер со стразами
Чокер со стразами
1) Cut the chain to the correct length
1) Отрежьте цепь нужной длины
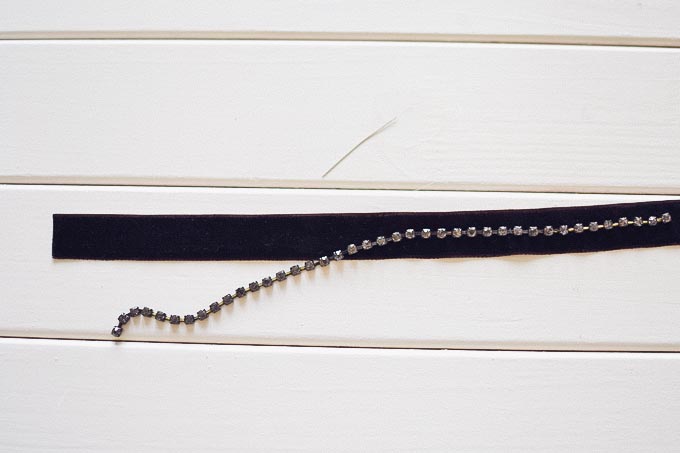
2) Attach a chain in the middle of the velvet
ribbon.
2) Приложите
цепь посередине бархатной ленты.
3) Then sew with the
help of needle and nylon thread.
3) Затем пришейте с
помощью иголки и нейлоновой нити.
4) Repeat all the above steps with the ends of the clasp.
4) Повторите все вышеуказанные шаги с застежкой.
If you want to be
sure that a choker make easy as one, two, three, watch the video. You will be
able to see not only the steps, but the finished result.
Чтобы убедиться, что сделать чокер просто, как раз, два, три,
посмотрите видео. Вы сможете увидеть не только все шаги, но и готовый
результат.
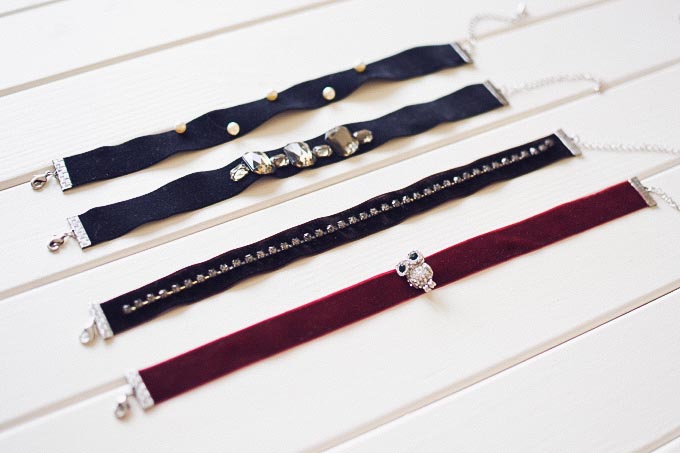
I shared with you 4
ideas of chokers, but if you prefer minimalism, that leave it totally black
necklace. It also looks great! Good luck!
Я поделилась с вами 4 идеями чокеров, но если вы
предпочитаете минимализм, то оставьте абсолютно черный чокер. Это тоже выглядит
шикарно! Удачи!
xoxo, Stacy