

A pencil skirt is not only the most popular silhouette among the other skirts. Often many people begin to learn the sewing craft with the creation of a pencil skirt. And all because it is not so difficult to sew it as it seems, at first glance, and you will see it today.
Юбка-карандаш не только самый популярный фасон среди остальных юбок. Часто она является первым предметом одежды, с которого начинают изучать швейное ремесло. И все потому, что сшить ее не так сложно, как кажется, на первый взгляд, и вы сегодня в этом убедитесь.
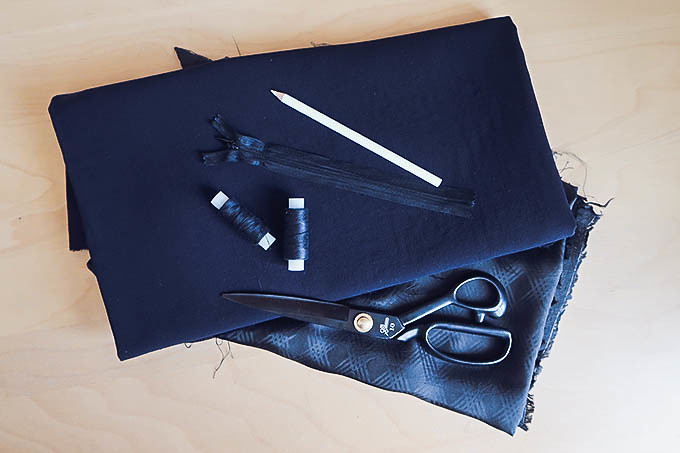
You will need, in addition to skirt pattern, 0.9-1 m of fabric (this value depends on the size of the skirt) and 0.7 m of lining fabric. The composition of the fabric can be mixed or natural (wool, linen, cotton). Also you will need a zipper, a button and a threads.
Помимо самой выкройки юбки, вам потребуется 0,9-1 м ткани (эта величина зависит от размера юбки) и 0,7 м подкладочной ткани. По составу ткань может быть смесовой или натуральной (шерсть, лен, хлопок). Также вам будет нужна молния, пуговица и нитки.
You will need:
Вам потребуется:
- Выкройка (смотрите мастер-класс по построению),
- Ткань 0,9 - 1 м,
- Подкладочная ткань 0,7
- Флизелин,
- Молния,
- Пуговица,
- Нитки.
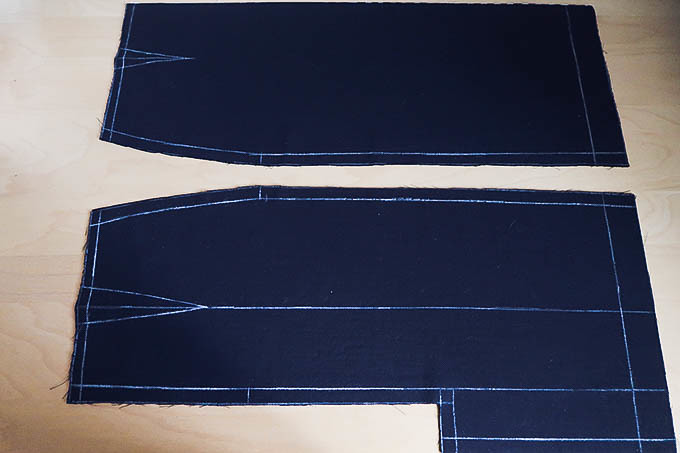
1) Pin the pattern to fabric, add allowances and cut out pieces. You should have one front and two back pieces.
1) Приколите выкройку к ткани, добавьте припуски на швы и выкроите детали. У вас должна получиться одна передняя и две задние детали.
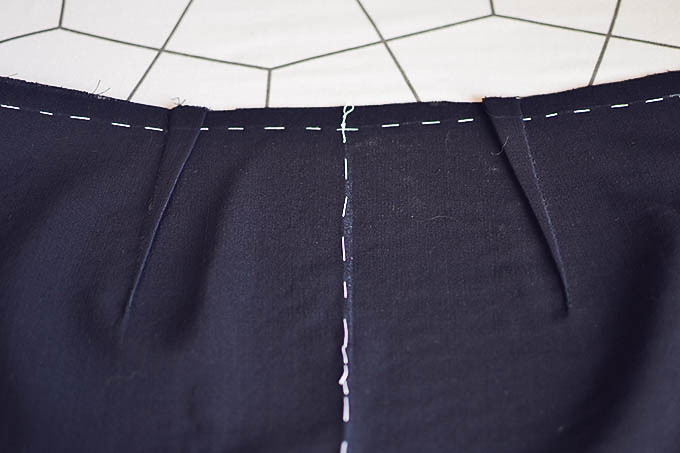
2) Pin both darts of the front piece. Repeat this steps with the back darts.
2) На переднем полотнище юбки сметайте обе вытачки. Повторите эти же действия с задними вытачками.
3) Then stitch each of them.
3) Затем стачайте каждую из них машинной строчкой.
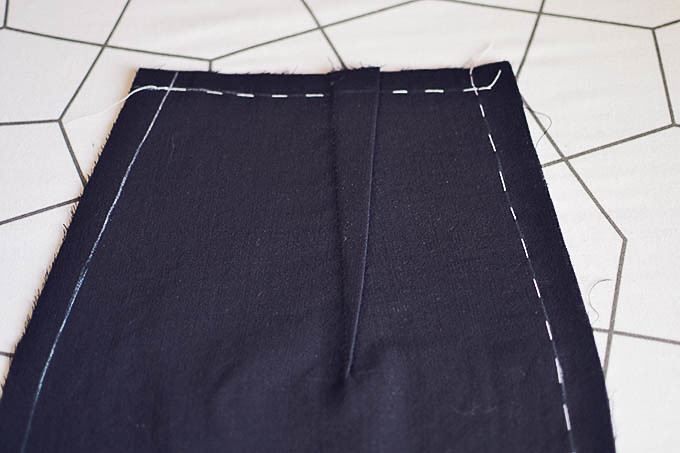
4) Press the darts toward the center of the skirt.
4) Заутюжьте вытачки по направлению к центру изделия.
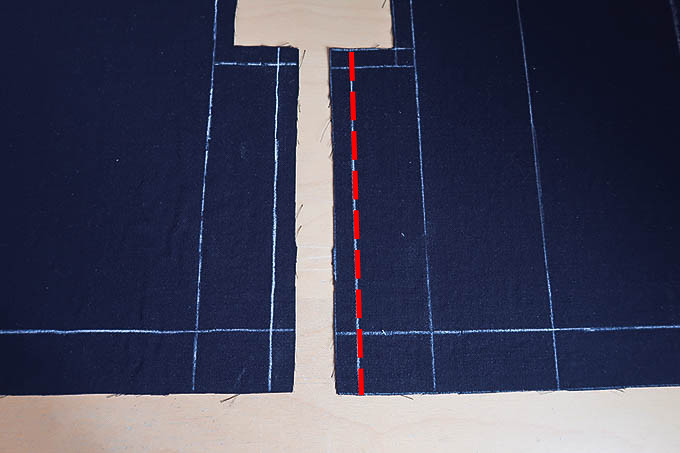
5) Put the back pieces in front of you with the wrong side up. Cut off the allowance on the right half.
5) Положите перед собой задние части юбки изнаночной стороной вверх. Отрежьте припуск на правой половинке.
6) Press interfacing to right side of a back slit. Also press interfacing to allowance of left side.
6) Проклейте флизелином правую сторону шлицы. На левой стороне приклейте флизелин к припуску на подгибку.
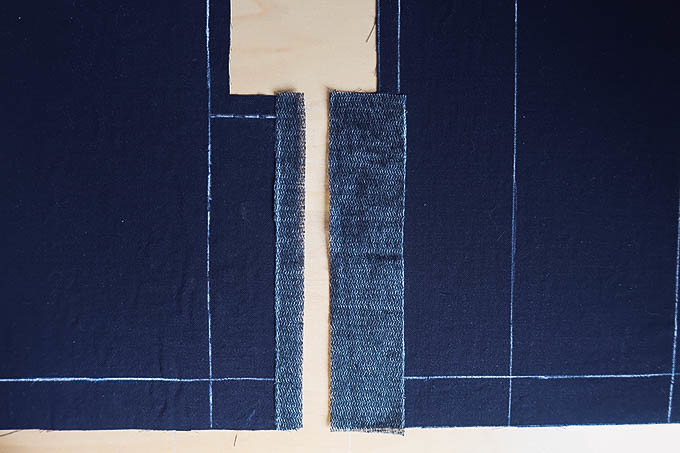
7) Make a serged seam to edges of back slit, using the overlock or zigzag stitch on the sewing machine.
7) Обработайте срезы шлицы на правой и левой частях юбки. Для этого используйте оверлок или строчку «зигзаг» на швейной машине.
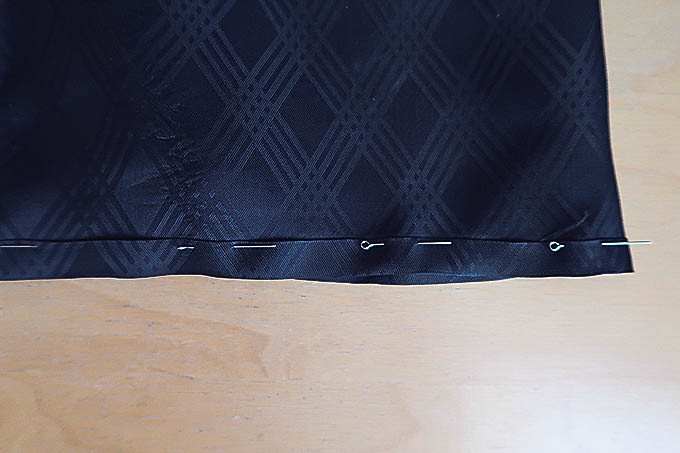
8) Then iron the seam allowance along the marked lines on the left side of the skirt.
8) Then iron the seam allowance along the marked lines on the left side of the skirt.
8) Заутюжьте припуск по намеченной линии на левой части юбки.
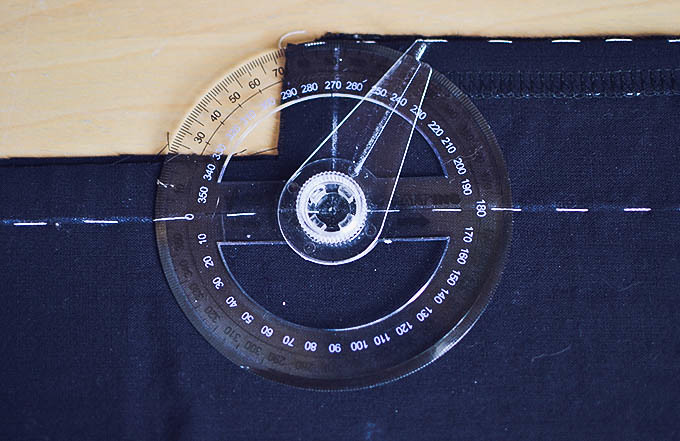
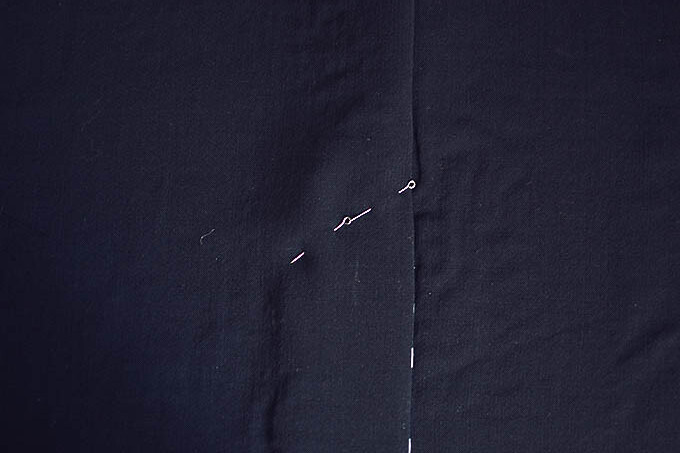
9) Fold the both parts of the back half of the skirt together. Mark the angle 120° from the end point of the back seam and draw a line.
9) Сложите вместе обе части задней половинки юбки. Отметьте угол 120° от точки окончания заднего шва и прочертите линию.
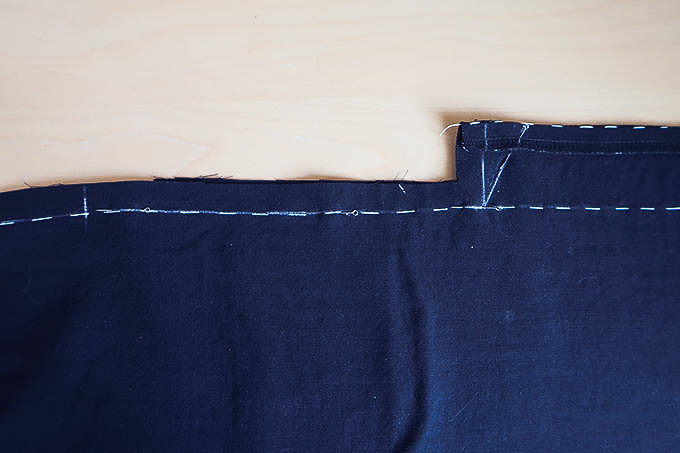
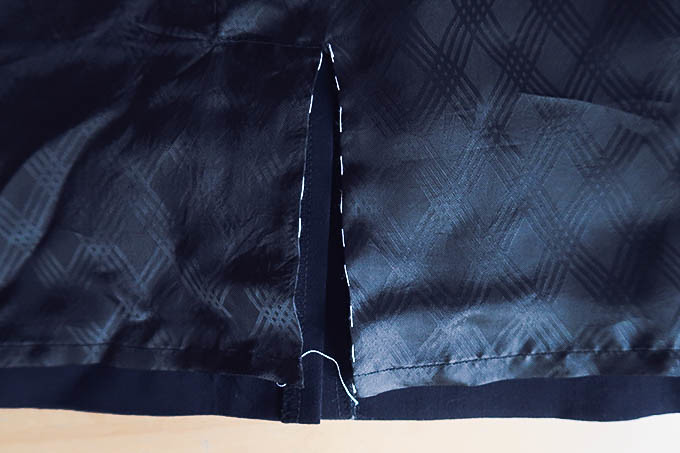
10) Pin the center back seam from mark to the end of back slit and then sew.
10) Сколите средний шов от линии втачивания молнии до конца шлицы, а затем стачайте.
11) Serge the center back seams using overlock or zigzag, so that the allowances of the skirt doesn't fall off when worn.
11) Чтобы край юбки не осыпался во время носки, обработайте его оверлоком или строчкой «зигзаг».
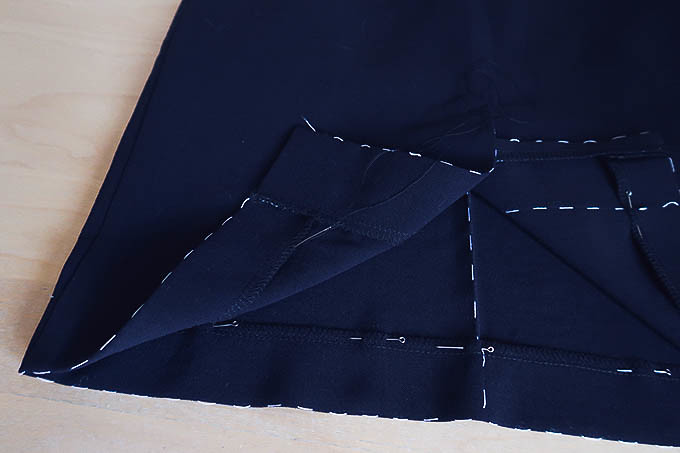
12) Put the back half of the skirt in the wrong side up. Pin the back slit, grasping the lower layer fabric. Then turn the fabric over and pin the back slit on the front side of the skirt.
12) Положите изнаночной стороной вверх заднюю половинку юбки. Сколите шлицу, захватывая нижний слой ткани. Затем переверните ткань и зафиксируйте шлицу по лицевой стороне юбки.
13) Place skirt front and back right sides together and sew along side seam.
13) Сложите вместе заднюю и переднюю части юбки и стачайте по боковым швам.
14) Attach invisible zipper to center back seam.
14) Вшейте молнию в средний шов.
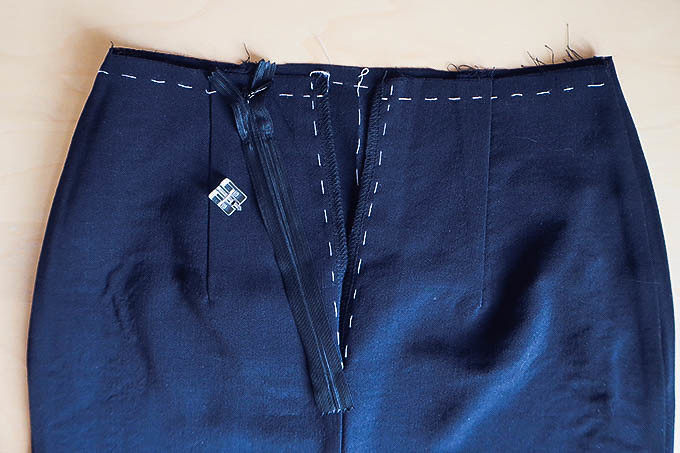
15) Repeat all steps with the lining. Stitch the back seam of the lining, extending it by 2 cm and leaving the untreated a back slit.
15) Повторите все действия с подкладочной тканью. Застрочите задний шов подкладки, продлив его на 2 см, и оставьте необработанной шлицу.
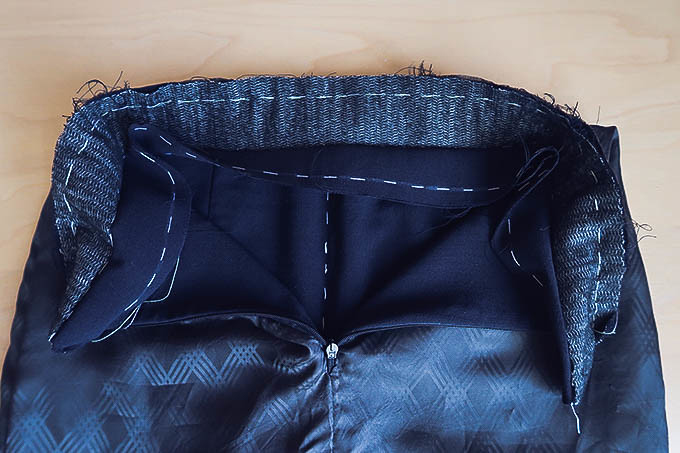
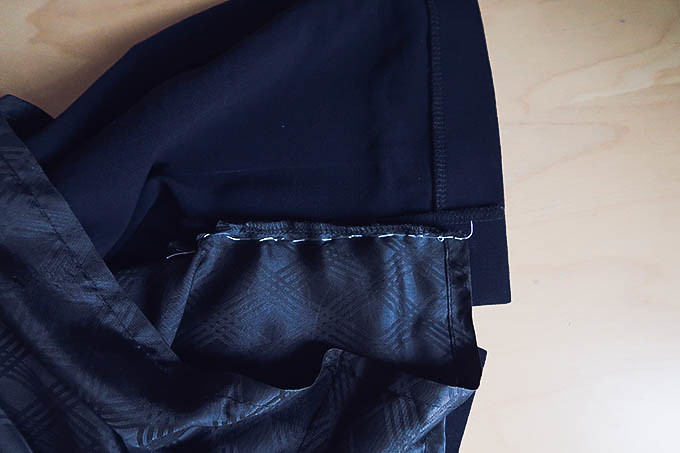
16) Sew the lining to the seam allowances of the skirt on both sides.
16) Пришейте подкладку к припускам шва юбки с обеих сторон, прихватывая тесьму молнии.
17) Sew the lining to the skirt along the waistline using running stitch.
17) Приметайте подкладку к юбке по линии талии.
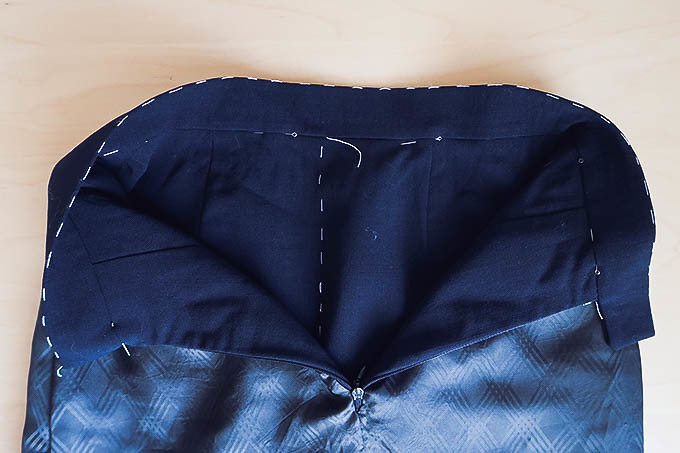
18) Cut out a waistband. Apply and iron interfacing onto the waistband, leaving a half with no interfacing.
Waistband length = Waist measurement+3 cm overlap+3 cm allowance
18) Вырежьте пояс. Проклейте ½ пояса флизелином. Согните пояс пополам лицевой стороной вовнутрь. Сшейте концы пояса с обеих сторон.
Длина пояса = Обхват талии+3 см хлястик+3 см припуск на швы
19) Trim the seam allowance about to 0.5 mm and cut out the corners to 1 mm from the seam.
19) Срежьте припуски до 0,5 мм и высеките углы наискосок не доходя 1 мм до шва.
20) Match the waistband and skirt face to face and then attach waistband.
20) Сложите пояс и юбку лицом к лицу, сколите булавками, а затем притачайте пояс.
21) Then turn out the waistband to the right side and fold the edge. Stitch in the ditch that to fix the edge.
21) Затем выверните пояс на лицевую сторону, подверните край. Для закрепления подогнутого края проложите строчку "в канавку" с лицевой стороны юбки.
22) Turn the edge of lining and sew.
22) Подверните низ подкладки и закрепите его с помощью машинной строчки.
23) Turn inside out the skirt. Make a notch on the lining, not reaching 1 mm to the control line.
23) Выверните юбку наизнанку. На подкладке сделайте насечку, не доходя 1 мм до контрольной линии.
24) Turn the resulting allowance and iron.
24) Получившийся припуск подверните и заутюжьте.
25) Then fix the edge by the machine seam.
25) Затем зафиксируйте подогнутый край машинным швом.
26) Sew a blind hem by hand.
26) Вручную подшейте низ юбки.
27) Sew from the wrong side loose edges of the lining to the edges of the back slit by hand or by sewing machine.
27) Пришейте с изнанки свободные концы подкладки к краям шлицы вручную или на машинке.
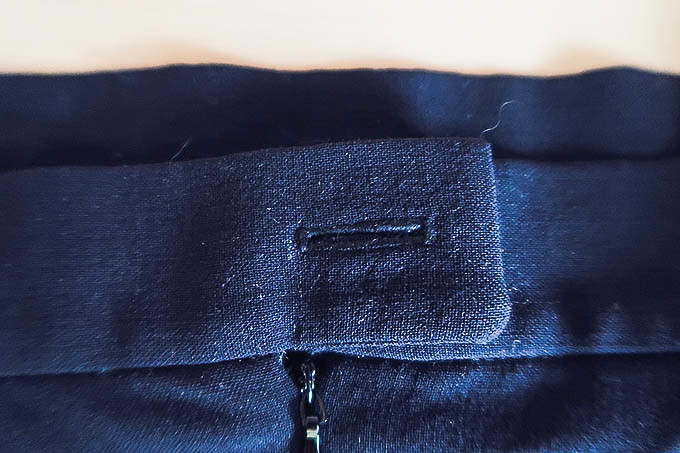
28) Make a buttonhole and sew a button to finish. Pencil skirt is ready!
28) В конце сделайте петлю и пришейте пуговицу. Юбка готова!
You can see the entire tailoring process and the finished result on the video so that all the stages are more understandable. This tutorial is universal and it can be used both for the own making pattern and for the finished one.
Вы можете посмотреть весь процесс пошива и готовый результат на видео, чтобы все этапы были более понятными. Этот мастер-класс универсальный и его можно использовать как для собственно построенной выкройки, так и для готовой.
This was the final message from the trilogy devoted to the creation of a pencil skirt. And already in the next post I will show the skirt in more detail. Have a good weekend!
Это было заключительное сообщение из трилогии, посвященной созданию юбке-карандаш. А уже в следующем сообщение я покажу юбку более подробно. Всем хороших выходных!
My other sewing projects:
xoxo, Stacy